white banner donaldson

Installing a Threaded Mount Air Filter Restriction Gauge

Air Filters

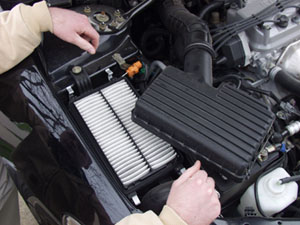
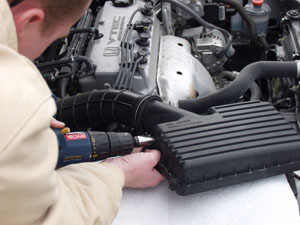
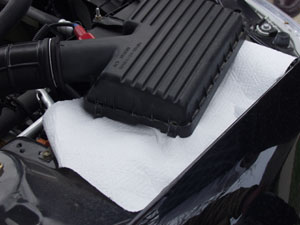
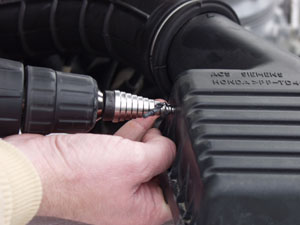
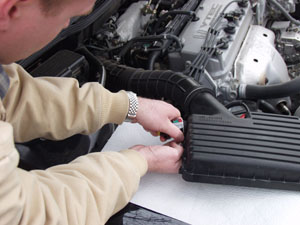
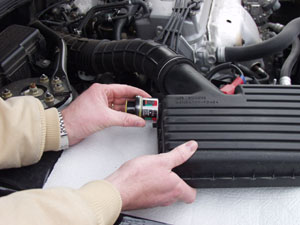
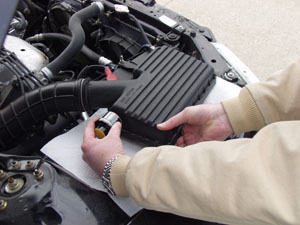
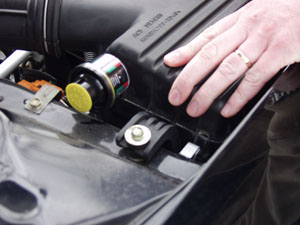
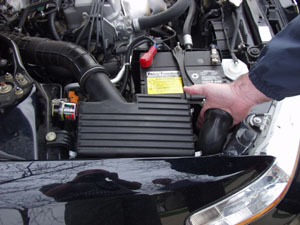
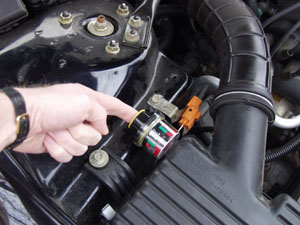
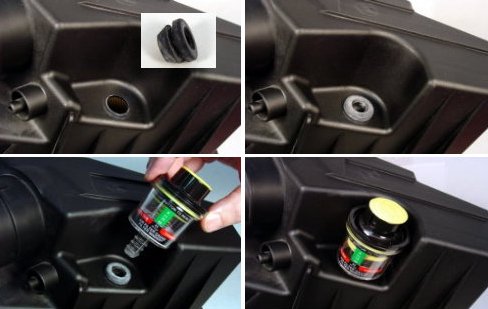
The Filter Minder® easily installs on air induction systems. It can be mounted directly to the air cleaner, remote mounted, or dash mounted.

Some air cleaners are not equipped with a mounting fitting. Adapter fittings, rubber grommets, and vacuum hose are available from Engineered Products Company

Note: See installation instructions for more information.

   Filter Minder® Retrofits


Fuel Filters

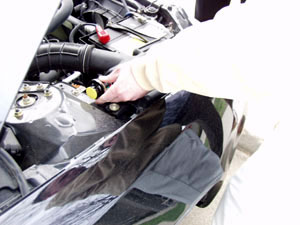
The Fuel Filter Minder® easily installs at the outlet of the suction diesel fuel filter with the use of an in-line tee fitting.

Ford Filter Minder® Graduated SwitchKomatsu Air Filter Restriction Gauge - Threaded Mount
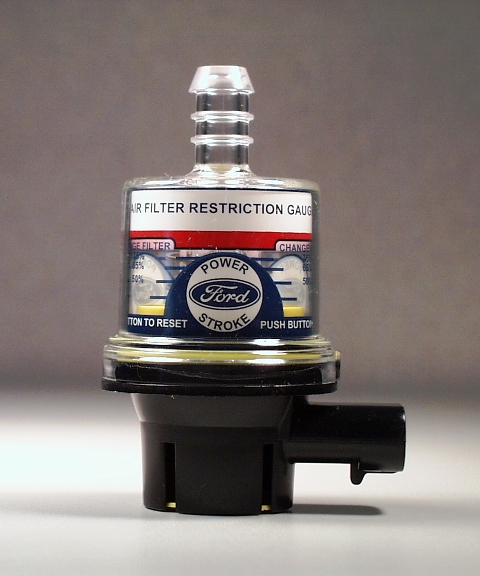
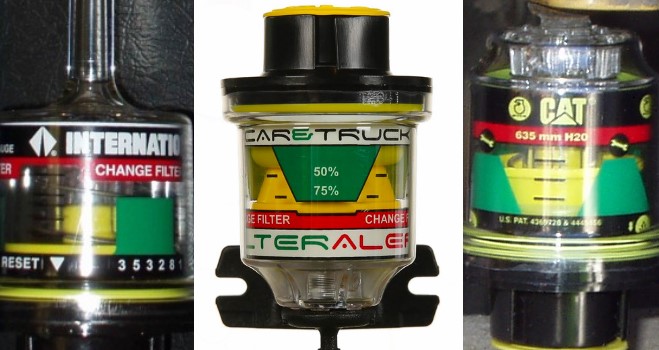
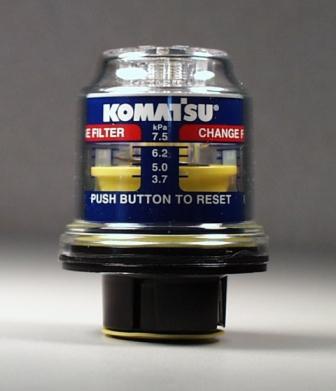
Filter Minder® air and fuel filter restriction indicators, gauges and most switches can be private labeled with your company name, logo, and part number along with your color preference.  Private part numbers can be laser marked on pressure and non-locking air and fuel switches and electronic sensors

Text can be printed so that it is readable with the Filter Minder® mounted in a specific location or orientation (with the reset pointing up or down).

Note:  For high volume annual requirements, there are no price penalties. There is a one-time artwork and design charge for each specific private label.Various Air Filter Restriction Gauges with Private Labels


Dyno testing at various air filter restrictions has shown that horsepower remains constant as filter restriction increases within an engine manufacturer's specifications.


Dyno HP Rating for Cummins N-14 Engine at 1500 RPM


The Filter Minder®:

  • Allows the full use of filter capacity
  • Reduces labor
  • Prevents excess fuel consumption from overly restricted air filters
  • Reduces the number of used filters going into landfills
  • Extends engine service life (Refer to: How Filters Work)
  • Prevents over and under servicing


Click on a chart below to see a full view of the cost comparison between replacing a filter on a time, mileage, or "looks dirty" basis and replacing a filter when it has reached its full capacity using the Filter Minder®.


Installation - Step One

  • Default
  • Title
  • Date
  • Filter Minder® Product Portfolio
  • The air filter restriction gauge should be installed on the air filter housing (clean air side).

    " data-mosaic-order-date="">
    Step 1A

    The air filter restriction gauge should be installed on the air filter housing (clean air side).

  • Select the location for the gauge and check hood clearance.

    " data-mosaic-order-date="">
    Step 1B

    Select the location for the gauge and check hood clearance.

  • The gauge may be mounted vertically or horizontally.

    " data-mosaic-order-date="">
    Step 1C

    The gauge may be mounted vertically or horizontally.

Installation - Step Two

  • Default
  • Title
  • Date
  • Filter Minder® Product Portfolio
  • Open the air cleaner housing and drill an 11/16" hole.

    " data-mosaic-order-date="">
    Step 2A

    Open the air cleaner housing and drill an 11/16" hole.

  • IMPORTANT: Do not let shavings fall into the intake manifold.

    " data-mosaic-order-date="">
    Step 2B

    IMPORTANT: Do not let shavings fall into the intake manifold.

  • A spade bit or similar cutting implement works well for plastic housings.

    " data-mosaic-order-date="">
    Step 2C

    A spade bit or similar cutting implement works well for plastic housings.

Installation - Step Three

  • Default
  • Title
  • Date
  • Filter Minder® Product Portfolio
  • Press the rubber grommet into the 11/16" hole (drilled in Step Two) until it seats into the proper position, locking in place.

    " data-mosaic-order-date="">
    Step 3A

    Press the rubber grommet into the 11/16" hole (drilled in Step Two) until it seats into the proper position, locking in place.

  • Push the gauge into the rubber grommet until fully seated. If needed, use water or a mild soap solution to help insertion.

    " data-mosaic-order-date="">
    Step 3B

    Push the gauge into the rubber grommet until fully seated. If needed, use water or a mild soap solution to help insertion.

  • Do not use solvents, oil, or other petroleum based products, as they can crack the clear housing of the Filter Minder®.

    " data-mosaic-order-date="">
    Step 3C

    Do not use solvents, oil, or other petroleum based products, as they can crack the clear housing of the Filter Minder®.

Installation - Step Four

  • Default
  • Title
  • Date
  • Filter Minder® Product Portfolio
  • Close the air cleaner cover, again taking care to prevent any shavings from entering the manifold. Ensure the Filter Minder® is securely seated.

    " data-mosaic-order-date="">
    Step 4A

    Close the air cleaner cover, again taking care to prevent any shavings from entering the manifold. Ensure the Filter Minder® is securely seated.

  • Unclamp the entrance to the air cleaner port and, with the engine running, slowly close off the opening.

    " data-mosaic-order-date="">
    Step 4B

    Unclamp the entrance to the air cleaner port and, with the engine running, slowly close off the opening.

  • Watch the Filter Minder® gauge ratchet up to indicate restriction. Push the reset button and you're done.

    " data-mosaic-order-date="">
    Step 4C

    Watch the Filter Minder® gauge ratchet up to indicate restriction. Push the reset button and you're done.