white banner donaldson

Installing a Threaded Mount Air Filter Restriction Gauge

Does horsepower decrease as air filter restriction increases?

Horsepower


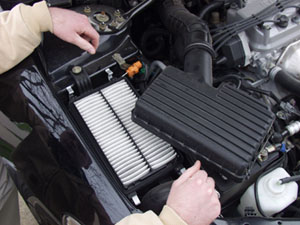
Dynamometer testing of horsepower at various filter restrictions has shown that horsepower remains constant as air filter restriction increases up to the maximum level of filter restriction recommended by engine and vehicle manufacturers.

Engine horsepower can decrease when air filter restriction exceeds the engine or vehicle manufacturer's recommendations.


Installation - Step One

  • Default
  • Title
  • Date
  • Filter Minder® Product Portfolio
  • The air filter restriction gauge should be installed on the air filter housing (clean air side).

    " data-mosaic-order-date="">
    Step 1A

    The air filter restriction gauge should be installed on the air filter housing (clean air side).

  • Select the location for the gauge and check hood clearance.

    " data-mosaic-order-date="">
    Step 1B

    Select the location for the gauge and check hood clearance.

  • The gauge may be mounted vertically or horizontally.

    " data-mosaic-order-date="">
    Step 1C

    The gauge may be mounted vertically or horizontally.

Installation - Step Two

  • Default
  • Title
  • Date
  • Filter Minder® Product Portfolio
  • Open the air cleaner housing and drill an 11/16" hole.

    " data-mosaic-order-date="">
    Step 2A

    Open the air cleaner housing and drill an 11/16" hole.

  • IMPORTANT: Do not let shavings fall into the intake manifold.

    " data-mosaic-order-date="">
    Step 2B

    IMPORTANT: Do not let shavings fall into the intake manifold.

  • A spade bit or similar cutting implement works well for plastic housings.

    " data-mosaic-order-date="">
    Step 2C

    A spade bit or similar cutting implement works well for plastic housings.

Installation - Step Three

  • Default
  • Title
  • Date
  • Filter Minder® Product Portfolio
  • Press the rubber grommet into the 11/16" hole (drilled in Step Two) until it seats into the proper position, locking in place.

    " data-mosaic-order-date="">
    Step 3A

    Press the rubber grommet into the 11/16" hole (drilled in Step Two) until it seats into the proper position, locking in place.

  • Push the gauge into the rubber grommet until fully seated. If needed, use water or a mild soap solution to help insertion.

    " data-mosaic-order-date="">
    Step 3B

    Push the gauge into the rubber grommet until fully seated. If needed, use water or a mild soap solution to help insertion.

  • Do not use solvents, oil, or other petroleum based products, as they can crack the clear housing of the Filter Minder®.

    " data-mosaic-order-date="">
    Step 3C

    Do not use solvents, oil, or other petroleum based products, as they can crack the clear housing of the Filter Minder®.

Installation - Step Four

  • Default
  • Title
  • Date
  • Filter Minder® Product Portfolio
  • Close the air cleaner cover, again taking care to prevent any shavings from entering the manifold. Ensure the Filter Minder® is securely seated.

    " data-mosaic-order-date="">
    Step 4A

    Close the air cleaner cover, again taking care to prevent any shavings from entering the manifold. Ensure the Filter Minder® is securely seated.

  • Unclamp the entrance to the air cleaner port and, with the engine running, slowly close off the opening.

    " data-mosaic-order-date="">
    Step 4B

    Unclamp the entrance to the air cleaner port and, with the engine running, slowly close off the opening.

  • Watch the Filter Minder® gauge ratchet up to indicate restriction. Push the reset button and you're done.

    " data-mosaic-order-date="">
    Step 4C

    Watch the Filter Minder® gauge ratchet up to indicate restriction. Push the reset button and you're done.